
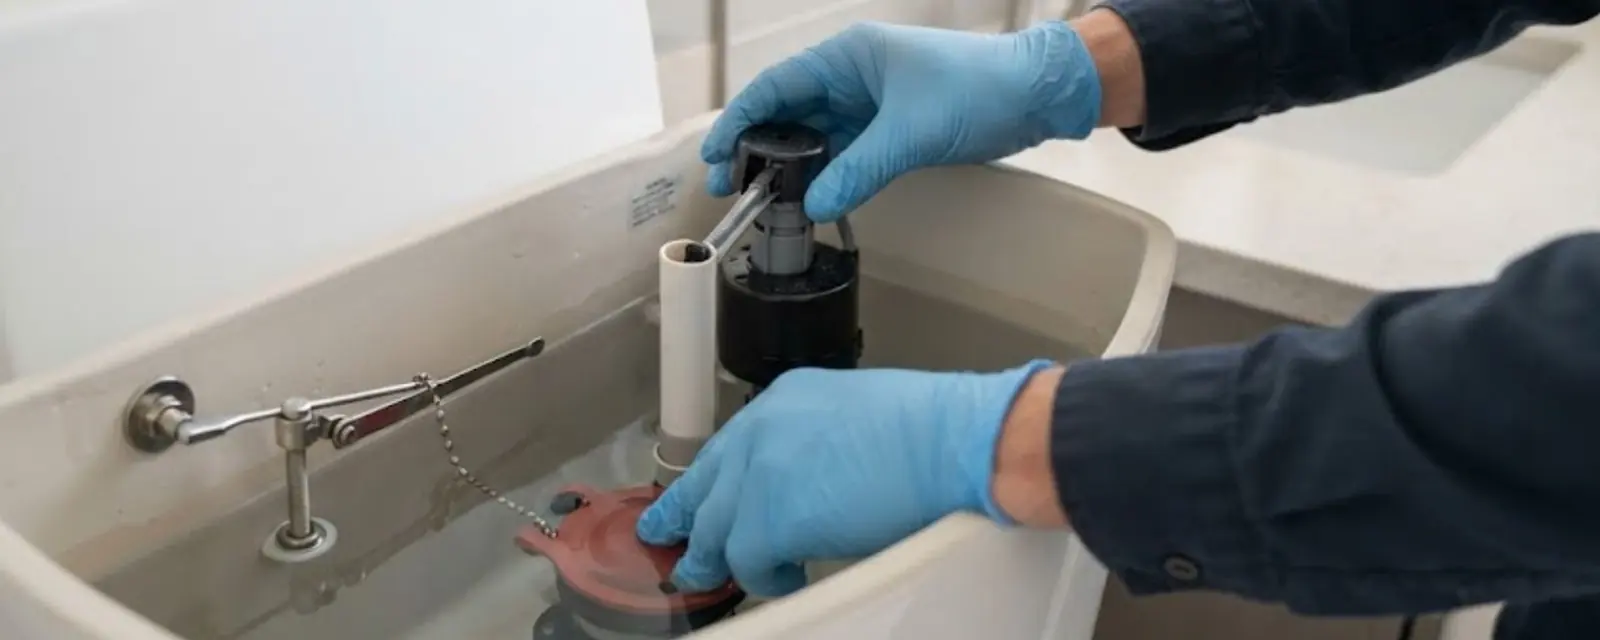
If the handle on your toilet hangs limp, sticks down or no longer lifts the flapper, you can replace the flush lever yourself in about 20 minutes. The job in Chesterfield, MO takes a new lever, an adjustable wrench and a towel. You close the supply, empty the tank, loosen one nut, swap the lever and set the chain slack.
Most of the trouble comes from three small details: which way the mounting nut turns, which side the handle belongs on, and how much slack the chain needs. This guide covers each one, compares the common handle styles, and explains how to tell when the lever is fine and the flapper or fill valve is the real culprit.
Replacing the flush lever, one step at a time
Shut the supply and empty the tank
Turn the small oval valve on the wall or floor behind the toilet clockwise until it stops. Flush once and hold the handle down so the tank drains. Sponge out the last inch of water so you are not working in a puddle.
Unhook the chain and loosen the nut
Lift the chain clip off the old lever arm. Then look at the big nut holding the handle on the tank wall. On most toilets this nut has a reverse thread, so you turn it clockwise to loosen it. Hold the arm inside the tank steady while you turn.
Pull the old lever and check the hole
Slide the handle out through the front or side of the tank. Wipe the hole and the porcelain around it. A hairline crack here means a tank repair is coming, so look closely before you go on.
Seat the new lever and tighten by hand
Push the new lever through from the outside, thread on the nut and turn it counterclockwise to tighten. Snug it with the wrench, but stop early. Porcelain cracks if you lean on the nut, and a hand-tight nut plus a quarter turn is usually enough.
Set the chain slack
Clip the chain to the arm so about half an inch of slack remains when the flapper sits closed. Too tight and the flapper hovers open, so the tank keeps refilling. Too loose and the lever lifts the chain without opening the flapper.
Open the supply and test
Turn the valve counterclockwise, let the tank fill, then flush three or four times. Watch that the flapper lifts fully, drops cleanly and stays seated. Trim any chain tail that can slip under the flapper.
Nut direction and handle side, the two things people get wrong
The reverse-threaded nut is the reason many first attempts fail. People crank counterclockwise, the nut tightens, and they decide it is seized. If the nut will not budge the usual way, try the opposite direction before you reach for pliers or force.
Handle side matters just as much. The lever arm inside the tank must point toward the flapper, and the handle outside should land where the tank has its hole, front, left or right. Some kits are reversible and some are not. Check the box before you buy, and hold the new lever against the old one to compare arm length and bend.
Trip-lever handles versus side-mount and button styles
Not every tank takes the same hardware, so match the style you have before you shop.
Tank trip lever (standard handle)
- A single handle on the front or side of the tank, linked to the flapper by a chain
- Fits most one-piece and two-piece toilets with one flush volume
- Cheap to replace, and plastic, metal and chrome-finish versions are common
- Easy to adjust by changing the chain link or the arm angle
Dual-flush button or push-style handle
- A button or two-part handle on the lid or tank that works a different valve than a flapper
- Replacement parts are specific to the brand and model of the tank
- Often needs a new actuator rod or cable rather than a simple lever
- Worth identifying the model number inside the tank before you buy anything
Flush handle loose or limp?
A new lever is a small job, but a bent arm may hide a bigger tank problem.
When the lever is fine and something else is failing
A new handle will not cure a toilet that runs, hisses or refills on its own. Use this table to match what you see with the likely cause.
| What you notice | Likely cause | Next step |
|---|---|---|
| Handle feels loose and flops around | Mounting nut backed off or lever arm bent | Tighten the nut or replace the lever |
| Handle moves but the flapper never lifts | Chain too loose, unhooked or snapped | Reattach and reset the slack |
| Water trickles into the bowl after flushing | Worn or warped flapper, or chain too tight | Check the chain, then replace the flapper |
| Tank refills with a hiss that never stops | Fill valve worn or float set too high | Adjust the float, or replace the fill valve |
| Water runs over the top of the overflow tube | Fill valve not shutting off | Replace the fill valve |
| Water pools around the base of the tank | Tank bolts or the tank to bowl gasket | Call a plumber for a seal repair |
A quick test: drop a few drops of food coloring in the tank and wait 15 minutes without flushing. Color in the bowl means the flapper is leaking, not the handle.
Tools and parts to have on the floor before you start
Gather everything first so the tank is not open longer than necessary.
- ✓A replacement lever that matches your tank's style and side
- ✓An adjustable wrench or channel-lock pliers
- ✓A towel and a small sponge or cup for the leftover water
- ✓A flashlight so you can see the arm and chain clip
- ✓A spare flapper, since the old one may be worn while you have the lid off
What a handle swap costs and what changes the price
A lever is among the least expensive plumbing parts you can buy, and doing it yourself costs only your time. If you call for help, the price depends on how many other parts need attention, how old the toilet is and whether the tank hardware is a standard type or a brand-specific one.
A plumber will usually look at the flapper, the fill valve and the supply line while the lid is off. Replacing worn parts together is often smarter than coming back twice. If the toilet is old and the porcelain is cracked, repair may cost more than it is worth. Our toilet repair team can give you a clear price before any work starts.
What Chesterfield homeowners should check
Replacing a handle is routine maintenance, but bigger toilet or tank work is a different matter. The City of Chesterfield contracts with St. Louis County for permitting and inspection, so permit rules vary. Ask the City or St. Louis County before work that may need a permit, such as moving a toilet or changing supply lines.
Before you open any tank, find your main shutoff valve. Missouri American Water's winter guidance says to know where it is, usually near the meter or where the line enters the house, and to test it. If the small valve behind the toilet is stuck or leaking, the main is your backup, so turn it once now rather than during a spill.
Source types: city website, utility winter guidance.
When to stop and call a plumber
Stop if the shutoff valve will not close, the nut spins without loosening, or you see a crack in the tank near the handle hole. Forcing any of those turns a small part into a floor repair. Call us if water keeps flowing after you shut the valve, or the supply line is weeping at either end.
The same visit can cover other fixtures that have gone weak, like a dripping sink where our faucet repair work applies. If you are adding a new fixture or changing the layout, plumbing installation is the right category. For an overflowing bowl, call the 24/7 line right away and keep the valve shut. We also serve homes in Ballwin and Creve Coeur.
Questions readers ask
On most toilets the mounting nut has a reverse thread, so clockwise loosens it and counterclockwise tightens it. If it does not move, check that you are not turning the wrong way before you apply more force.
Leave about half an inch of slack when the flapper is closed. If it is too tight the flapper cannot seal, and if it is too loose the handle cannot lift it fully.
You can, but it is easier and tidier with the supply closed and the tank drained. A dry tank also lets you see the arm, the chain and the flapper without reaching through water.
The flapper or fill valve is the likelier cause. Try the food coloring test for the flapper and look at the float and fill valve if you hear hissing.
The City of Chesterfield contracts with St. Louis County for permitting and inspection, and its Department of Planning handles zoning approval. Ask them before any work beyond a simple repair.
Reference points for this guide: The Uniform Plumbing Code (UPC) and the International Plumbing Code (IPC) are the model codes most U.S. jurisdictions adopt, and the local permitting authority decides which edition and amendments apply. Water hardness figures come from Missouri American Water and its 2021 water quality report for the St. Louis region. This guide is general information and does not replace a visit.